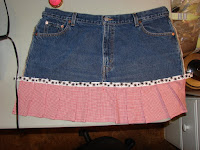
Instructions:

1. Cut out the back sides of the jeans as shown. Note I left the side seams of the jeans intact on this one, I kind of liked the look.
2. Open up the crotch seam a couple of inches until you can get it to lay flat. Sew that seam down.
3. Square off the back of the shirt. Cut this in half lengthwise.


4. Sew the two pieces right sides together to create one long piece. Mine ended up being 7 ¼” wide by 39 ½’ long.
5. Hem three sides of this fabric.
6. Pin the center seam of the shirt fabric to the center seam of the jeans. Pin the outside edges of the two fabrics together. Now just hand pleat the shirt fabric and pin down. I didn’t get too exact on this. Sew it on, flip it over and iron down the pleats and seam.
7. Pin on the ribbon and sew it both on the top and bottom edges, concealing the pleated seam. Fold the ends of the ribbon over to the back of the apron and sew down.

8. Cut a length of the black (or contrasting) fabric 4” x “64. I had to cut 2 pieces and sew them together to get the 64”.
9. Fold the fabric in half lengthwise, right sides together, and sew the long edge. Turn right side out. Tuck in the unfinished edges, and topstitch to finish.
10. Loop the tie in the belt loops and tie.


No comments:
Post a Comment