Wednesday, December 10, 2014

Christmas Wreath 2014

This week I have a quick project and a short blog.
I started out with a cheap estate sale wreath, a broken ornament and some turkey feathers picked up in my front yard.


I bought these cute ornaments at a garage sale this summer and used them to decorate at our Christmas in July weekend.  Unfortunately this one got broken, but he was so pretty I kept him. 


So a little hot glue and voila!


I have it for sale at Paris Antiques, but won't be too disappointed if it doesn't sale and I have to keep it.
 Linking up at beyond the picket fence

Tuesday, November 25, 2014

Christmas Picture 2014

A couple of years ago I showed a Christmas picture that my genius husband put together for me that I love.  http://chickinthestyx.blogspot.com/2012/11/christmas-art.html  It is just a gift bag that he framed, but I hang it up every year.  What really cracks me up is how many times that post has been pinned.  This year I found a great show poster of a Christmas play done in 1993 in Seattle.  The only problem was finding the right frame.  I finally found this ugly 1980's picture at St. Vincents, it wasn't an exact fit so I made my own matting, painted out the frame and ta-da! 


I really like it and wouldn't be to sad if it doesn't sell, it could be a new addition to my decorations.

Linking up at these parties:


Sunday, November 9, 2014

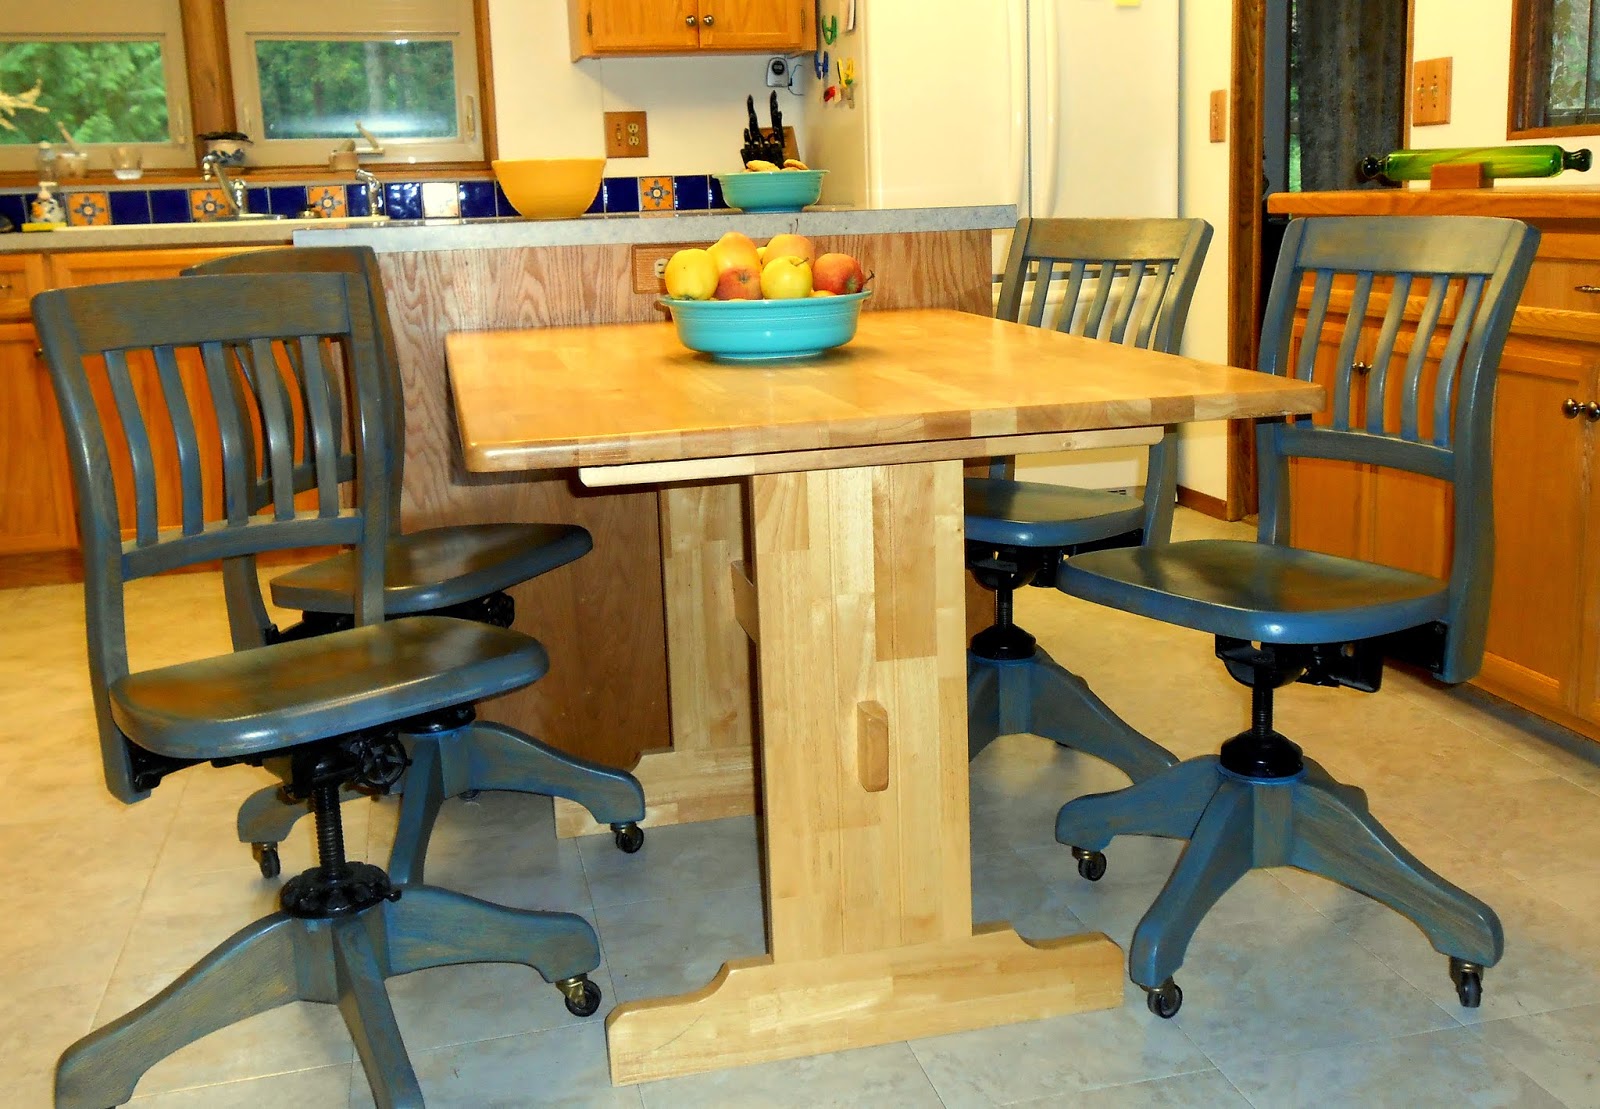
Great New Kitchen Chairs

I had the best day yesterday!  I went with my sister, nephew and his wife, to A Very Vintage Whites Christmas Market in Kalispell Montana.  Now this wasn't a little jaunt.  According to Google it was 288 miles, and it took us about 4 hours to get there.  Now if you lived around here you would understand that to most of us, eastern Washington, northern Idaho, and western Montana are unofficially one state, so the drive was no big deal.  Well let me back that up a second and give a huge thank you to my nephew Jeff for driving.  The trip itself was a great part of the day, just think of chit-chatting, a little serious discussions, and sharing some religious beliefs for eight hours.  The show was great, there were 104 venders and they all had great stuff.  I saw a lot of things that have been posted on different blogs and pinned on Pinterest, plus many new things.  And then (key the lights and music please) I found these chairs!!!!!

Monday, November 3, 2014

Mid-Century Beauty


I LOVE mid-century modern furniture.  It doesn't fit in my decorating scheme at home, so that is why I love revamping different pieces to sell.

Friday, October 24, 2014

The Soulful Sparrow


Well, as I said in my last post, I just got back from visiting my daughter in Chicago.  While I was there we went to a farmers market in Elgin and had the best chocolate almond croissant from Katic breads.  You have got to try these if you are ever over that way!   We needed to walk off some of that goodness so we explored downtown Elgin.  We stopped at a great store called the Soulful Sparrow.  I absolutely fell in love with this place.  This was an old house that owners Judy Walsberg and Mary Pierce transformed into a wonderfully eclectic gift store.  They were nice enough to let me photograph it so I could show it here.
 They had great displays,


 Fantastic Halloween Stuff,


 Nice clothes,


My beautiful daughter showing off one of the scarfs,


And a few ideas I might have to borrow.


Make sure to check out the Soulful Sparrow if you are ever in the Chicago area.

Chick in Chicagoland


I haven't posted anything for a long time because I spent three weeks in Chicago with these beautiful ladies; my daughter and granddaughters.  They just transferred to Chicago this summer, barely got moved in, and my son-in-law had to leave for training for a month.  It was great to just hang out, shop (a lot!), eat great food and explore new places with my daughter.  Of course there was some junking, and revamping going on too.

Tuesday, September 2, 2014

Star Light

So what can you get for a $1.25?  Well I got a pretty cool lamp.  I found this lamp for a buck at a garage sale.  The shade was banged up and scorched but that was OK since I found this strainer a week before for a quarter.


I knew the strainer would make a cool lamp shade so I had hubby remove the feet and handles, then drill out the center of the top star.  All I did was screw on the finial and voila...


I couldn't capture the fun star lights this puts off but it is pretty cool.  Best thing is that I just found another strainer just like it this weekend, had to pay a whole $.50 for this one - oh well.

partying at:  beyond the picket fence
funky junk interiors

Wednesday, July 30, 2014

Rainy Day + Pallet = Potting Bench

This is my husband and my first pallet project.  Before he thought pallets were just garbage (silly man!).  Our brother-in-law gave him one to take home and throw on the burn pile.  This wasn't just a little pallet it was huge, they had to saw it in half to get it in the truck.  It was used for siding for a shop.  Well I guess a little of my junking has rubbed off on hubby because he didn't throw it on the pile to burn, he made a potting bench out of it.  


It rained last week for the first time in about a month and it felt so good.  I worked on cleaning out my treasure shed where all my soon to be fab furniture is stored, and Mr. in the Styx cleaned out the shop.  After that we really didn't have much to do so he decided to make a potting bench.  I'd suggested earlier that maybe he could build one out of the spindles, legs, arms and backs of a couple of old chairs I tore apart, guess that will happen later.  Anyhow, he measured, cut, squared up, and screwed together this great bench.


I couldn't wait to paint it.  I've been wanting to try a technique that Becky at Beyond the Picket Fence does (please check it out here http://bec4-beyondthepicketfence.blogspot.com/2012/04/how-did-you-paint-that.html )  I love all of her stuff!  So I went through a bunch of old paint, threw some out, mixed some together, and did a couple of test boards.  This is what I came up with.


Sorry, I'm not great at photography so the lighting isn't good.  The blue is layered and duskier then it looks, and the pop color is a bright spring green.  I also put some cherry stain over the blue, then finished it off with some Defthane.  I was planning on selling it next spring at the Fancy Farm Girls show, but my sister-in-law saw it sitting out front and wanted to buy it for a wedding present for her son and future daughter-in-law.  Well I couldn't let her do that, so it will be our present to them next month.  Congratulations Skyler and Heather - Plant some Love and watch it Bloom!

I will be linking up to:
beyond the picket fence
miss mustard seed
funky junk interiors

Sunday, July 20, 2014

Christmas in July and the Family Chopped Challenge 2014


Merry Christmas!

Our family has gotten so big that it is difficult to get all of us together in one house to enjoy Christmas, so six years ago we decided to celebrate Christmas in July.  My sister, brothers and myself take turns hosting each year.  The host finds a campsite, plans activities, chooses a theme for the present exchange, and sets the meal plans.  My brother and I switched turns this year because of a glitch in our campsite reservations.  We live in the woods with a good location for camping, so we were happy to host at our home this year.  It was kind of a blessing in disguise to only have two months instead of a year to plan.  We quickly came up with all of our ideas, and sent out the invitations.  We were also blessed this year to have our daughter and her family visiting.

Friday, June 6, 2014

Fancy Farm Girls 2014

I can't believe it's been almost a month since the Fancy Farm Girls show in Moses Lake WA.  It was so much fun getting ready for it, setting it all up, and enjoying the time with family.  


There were four couples involved in our space, my husband and I, my sister & brother-in-law, my brother and sister-in-law, and my nephew and his wife.  Three out of the four couples did great, me not so much.  I thought I had a great mix of stuff, but the things I thought would fly out the door ended up coming home with me, and some things I just threw in on a lark sold.  Go figure!  Oh well, I had a great time and am already stockpiling stuff for next year.


I think it was actually a blessing in disguise that I came home with a lot of pieces.  I will be so busy with my daughter & her family coming to stay for three weeks, and having 50 people camping for our Christmas in July weekend, that I really don't have time to work on furniture.  


Thank you Shannon for a great show.  Can't wait for next year!

Partying at:
miss mustard seed


Friday, May 2, 2014

Asparagus Tart with Balsamic Reduction


This was a hit at Easter, so I thought I would share.
1 Package of Puff Pastry (thawed)

1 (4 ounce) package Rondel cheese with herbs, room temperature
1 small bunch of  Asparagus cleaned and trimmed
2 T. Olive Oil
1 t. Sea Salt
1/2 C. Balsamic Vinegar

Line a baking sheet with foil and lightly grease.  Place 1 sheet of puff pastry on the pan and bake at 450 degrees for 15 minutes until lightly browned.  Carefully remove to a serving platter and cool.

Toss asparagus with olive oil and sea salt on the backing pan and lay out in a single layer.  Roast at 450 degrees for 12 to 15 minutes until slightly tender.

Reduce the balsamic in a small pan until halved.

Spread the cheese on the puff pastry then top with the roasted asparagus.  Drizzle the balsamic reduction over the top.  Cut into 2 to 3 inch squares and serve

Suggestions:  Cut the asparagus into bite size pieces for easier eating.  You could also cut the puff pastry into individual portions before baking.

Rustic Fancy Farm Girls

One week and counting for the Fancy Farm Girls Vintage Market!!!!!!!!  My last post showed some things that will be in our Shabby French section, this time I thought I'd show you a few things that will be in our rustic section.


Sorry about the lighting but the sun was out and we actually hit 70 this week so I just had to do an outdoor shot.  As I said in my last post, there will be four of us (plus our spouses) representing Paris Antiques at the show.  Our space is going to be 30x12 which we thought might be too big until we all started getting our stuff ready.  We're doing three different sections; garden, manly/rustic, and shabby French.  I think I've had the most fun with the rustic stuff, maybe because it's not really my norm.  See that wonderfully rusty metal in the back?  I found it last year for $3 at a yard sale.  My husband welded some of the spare pieces on the upright one, but other than that they are just like I bought them.  Won't they be great in a garden?
I had fun with the two tool boxes and the chair experimenting with vinegar stain.  If you've never done this you should try it.  Just take a piece of steel wool and soak it in some white vinegar over night, then use the vinegar to splash (yep no need to be neat with this) on some bare wood.  It will deepen and stain differently on each piece, but generally it makes them look rustically aged.  One bonus with the covered tool box was that the vinegar took away the musty, moldy smell.  I splashed on a wood preservative over the stain on the chair to help protect it outside. 
The upholstery on the chair and footstool are coffee sacks my nephew picked up for me from his roaster.  These are great except for the mess of burlap all over when you are done.


Oh, I'm getting so anxious for the show.  Please stop by if you are in Moses Lake WA. May 10th.  We'll see you at the fairgrounds.
Linking up to
 miss mustard seed
funky junk interiors 

Sunday, April 27, 2014

Hand-Me-Downs & Fancy Farm Girl

In just a little less then two weeks I will be having a blast as part of the Fancy Farm Girl Vintage Market in Moses Lake WA May 10th.  My sister, brother, nephew, all of their spouses, and myself will be showing as Paris Antiques.  We've all been working like crazy to get ready.  This is a brand new show and we're not sure what to expect, so we are doing three separate looks.  These pieces will go in our shabby French side, there will also be a garden section and a man cave/rusty goodness section.
The three main pieces in this picture were all given to me by different family members.  I really want to thank all of them for not only these, but all of the great stuff they have given me to revamp and sell.  It is so nice to be given something that someone you know once enjoyed, and be able to make it into something different for someone else to like for awhile.  
I don't have a before picture of the bench, it was a dark veneer with a cream seat. My brother-in-law said he was tired of putting it back together and gave it to me.  A little gluing, wood filler, paint and upholstery and voila!  The chair was my brother and sister-in-law's, here is the before:

The bones were really good, but the upholstery was shot, and a little update wouldn't hurt.  It took me two days to pull off the old upholstery, with a few choice words along the way.   Have I said yet how much I hate upholstering?  It is really not my niche.  I even have a hard time with a simple dining chair seat.  Well, next was painting.  I had bought a bunch of Rust-oleum universal that I didn't use on another project.  This paint should stick to anything so I thought it would be good for this.  Well, the first coat went on great, but when I sprayed on the second coat a few days later it started to alligator and bubble.  A few more choice words and I was just about ready to give up.  Thank goodness for Mr. in the styx!   He started sanding back everything that had bubbled, and was about to re-spray it, when he showed me.  It looked great!  I couldn't have distressed it that well.  So a little polyurathane, a few days of upholstering and voila 2! 
The last piece in the picture is the plant stand.  It was a little wobbly but it just needed tightened up and voila 3!  This last piece came from my husband's brother and his wife.  They gave us so much stuff when they remodeled their family room, I can't thank them enough.
If you are anywhere around Moses Lake on the 10th of May, stop by and have a great time at the Fancy Farm Girls Vintage Market.
Linking up to:
coastal charm 
a stroll thru life
savvy southern style 
diy by design 
beyond the picket fence 
 

Friday, March 28, 2014

Fold Over Table & A Lesson in Resin

 "What is a fold over table?" you might ask.  Well I didn't know either until I came across this little gem.  I picked it up at a garage sale for $10.  I thought it was a great deal, that is until I went to refinish it.  A fold over table is a table that can be converted to either a coffee table or a dining table by this ingenious mechanism.  You just pull it up, slide it over, and fold over the top.  Pretty cool huh?
   

 Then the headache started.  I thought I would just refinish the top on this and then use some Howard's Restore a Finish on the base.  So on a nice hot day last summer my husband removed the top and I slathered on some heavy duty stripper to it.  I let the stripper work it's magic for 15min. and tested it. Nothing!  So I left it on for another 15min.  Still Nothing!  I tried a different stripper. STILL NOTHING!  When I say nothing, I mean it didn't even faze it.  Then my husband took over.  He started with the quarter sander.  Nope nada.  Then he got out the belt sander.  This finally started taking off some stuff. We finally figured out that the finish was probably resin. I forgot to say that the reason the top needed redone was because the finish was all cracked and alligatored.  So after days of sanding and a few heavy duty sanding belts we were finally down to veneer.  Yep, this beautiful wood was veneer over press board.  By this time neither of us wanted to look at it for awhile, so off to the storage shed until winter.
Fast forward to February - After two wonderful weeks in Maui, and with the island attitude of "no worries" still in my heart, I decided to take on this beast again.  Now I know I should have just used some ASCP to paint it, but I wanted to use up some of my old paint.  So I primed it with some Zinsser, custom mixed some dark grey latex, mixed in my homemade chalk solution and painted away.  Three coats later, a little Martha Stewart coffee glaze and some polyurethane and it was ready to put back together.  My husband rebuilt the soss  hinges that hold the two pieces together because these are really expensive and hard to find.  I also painted two chairs I found to match and used fabric from an old pillow to cover the seats (you can see the remaining pillows on the sofa).  
So here it is, both down as a coffee table, and lifted as a dining table.  Great thing is that it sold in a few weeks and now I don't have to think about it anymore!


Linking up to: